Note: Please read the article carefully before proceeding! If in the process of using you encounter any errors, such as broken download links, slow loading blog, or not being able to access a certain page on the blog … then please inform me through the Contact page. Thanks!
// Instructions to fix the error when installing the 3rd software on macOS
When it comes to MacOS, it is commonly known as an operating system with a beautiful graphical interface, great hardware optimization capabilities, and a smooth and seamless user experience. In addition, Apple has also created an operating system with extremely high security.
Two of the most common security barriers on MacOS you hear are GateKeeper and System Intergrity Protection (SIP), they will prevent malware and security for MacOS system extremely safely.
But also because these two barriers are enabled, you will not be able to install some applications outside the App Store, such as Microsoft's Office suite, Photoshop toolkit, Illustrator … of Adobe.
Therefore, in this article, I will guide you to turn off Gatekeeper and SIP on MacOS Mojave and Catalina to avoid errors when installing 3rd software on Macbook!
Read more:
I. How to install 3rd party software on Macbook?
Before implementing Gatekeeper as well as SIP, we should also find out what it is and how it works on MacOS.
#first. System Intergrity Protection – What is SIP?
System Integrity Protection, commonly referred to as SIP, is a security feature for MacOS that Apple first introduced on El Capitan 10.11 version of this operating system.
SIP includes a number of mechanisms implemented by the Kernel, whose main function is to help protect and prevent macOS system folders and files from being modified or modified by processes without “permission.” "Specifically or even Root users and users with Root (sudo) privileges.
You may not know: In Linux, Root is the highest level user, having all the rights to access and modify the Linux system. You can also get Root privileges when running commands by adding
sudothen enter the password.

It is also because this “youth” is enabled by default on later MacOS, so you will encounter errors when installing applications that require high access outside the App Store.
#2. What is Gatekeeper?
If SIP is in charge of protecting system files and directories, Gatekeeper acts as a true “gatekeeper”.
Its task is to carefully examine the applications and software you download from external sources before allowing it to work on MacOS systems.
For applications and software that are not available from the App Store or from developers that have not authenticated with Apple, you will receive a window as shown below when opening these software.

Especially with some applications, software that Gatekeeper has detected malicious code, you will not be able to open these software at all.
This feature has been available since MacOS Snow Leopard 10.6 and up to Sierra 10.12, it is enabled by default so users cannot install external software.
# 3. How to turn off Gatekeeper on MacOS Sierra 10.12 – Catalina 10.15
During use and working, the need to install applications from the outside is understandable, because the application store on the App Store is not really very rich.
Most of the software that I am used to using on Windows is not available on the App Store, so the only way is to install it outside. But before you want to install anything, you also need to turn off the Gatekeeper.
Perform:
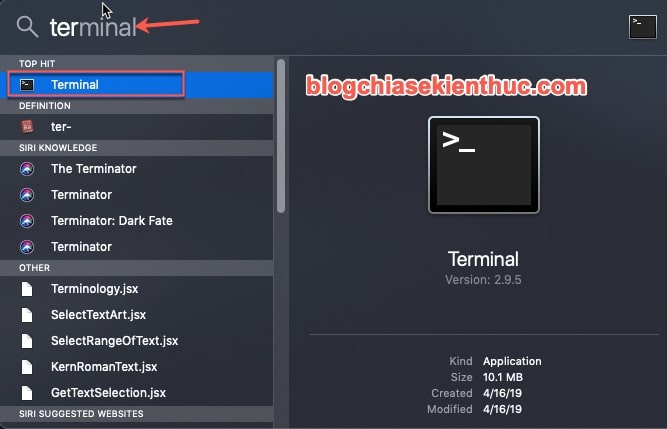
+ Step 1: Very simple, you just use the key combination Command + Space open Search Spotlight => then enter Terminal => then press Enter the to Terminal on MacOS.
This is the fastest way to open Terminal, guys, unfortunately MacOS doesn't support keyboard shortcuts
Ctrl + Alt + Tlike Linux, but you can also call Siri to do it instead!
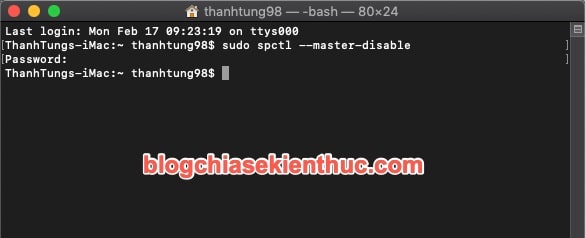
+ Step 2: Then paste or type the following command into the newly opened Terminal window (enter the password when prompted) => then Enter again to execute the command.
sudo spctl –master-disable
If you enter the wrong command or password, you will receive a notification Sorry, try again – Please turn off Vietnamese keyboard and input again correctly.
If you have entered it correctly, the Terminal will not show anything as shown below, so that's OK.
+ Step 3: Next, to make sure that the Gatekeeper is off, enter the following command to check.
sudo spctl –status
If Terminal returns the result is assessments disabled As shown below, congratulations, you have successfully disabled Gatekeeper already.

And after successfully closing the Gatekeeper, it also means that you have enabled the option Anywhere – allows downloading and installing software / applications outside of the App Store on the device, applications of unknown origin instead of installing only from the App Store and verified developers as before.
You can check it again by visiting the following link:
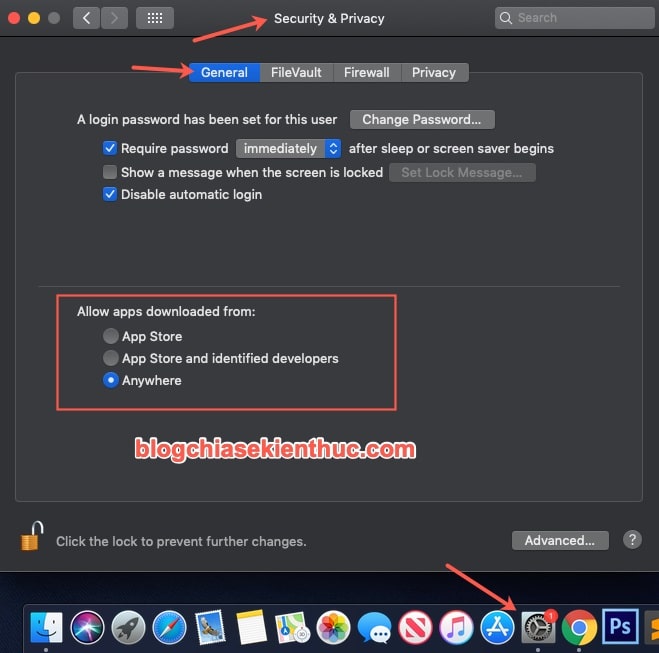
System Preferences / Security & Privacy / General Tab
In line Allow apps downloaded from: If selected on Anywhere then OK, and yet you click on the padlock icon in the lower corner of the window, enter the account password => and finally tick the line Anywhere Yes, the Gatekeeper shutdown is complete.
# 4. How to turn off System Intergrity Protection (SIP) on MacOS
Note !!!! : Before continuing to follow the instructions below, please open up your phone or other Laptop / PC => and access this article again because we will perform in the Recovery environment of MacOS, you will not You can access the Internet to review what the command is if you forget it. OK, got it
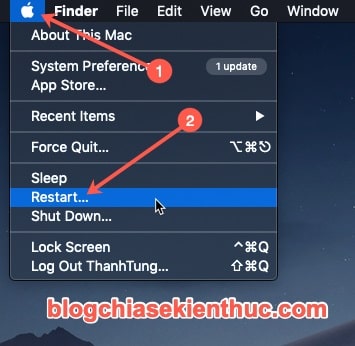
+ Step 1: To boot into mode Recovery of MacOS, click on the Apple menu in the toolbar => and select Restart simultaneously hold the key combination Command + R during reboot into the operating system.
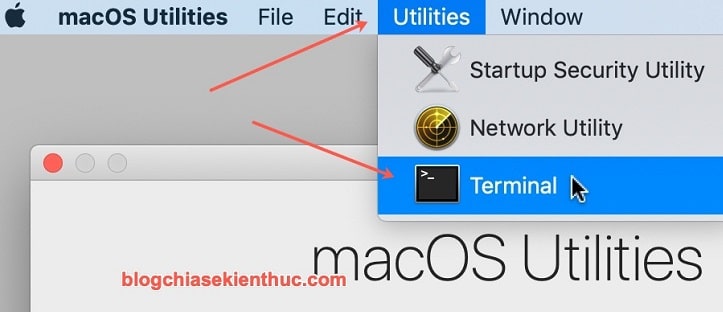
+ Step 2: If done correctly, you will be able to open it MacOS Utilities as shown below => next click Utilities on the toolbar => and select Terminal to open Terminal.
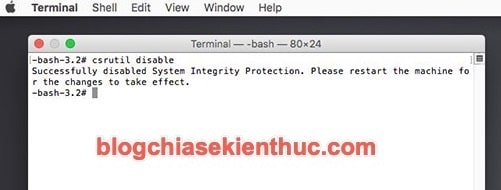
+ Step 3: Next, enter the command csrutil disable go to that terminal window => then Enter to deactivate SIP.
If you enter it correctly, the result will be returned in Terminal Successfully disabled System Integrity Protection – SIP has been deactivated
=> You type the command restart go to Terminal => then Enter to reboot and start installing the software you want.
And if you want to turn on the two security barriers just turned off again, it's simple, nothing difficult at all.
Please run the same commands again in Terminal, but instead of disable then fix it again enable at all commands yes disable is right away. That's it!
II. Epilogue
So I have just finished instructions for you very detailed ways turn off SIP security (System Integrity Protection) and Gatekeeper on macOS to install external applications on macOS already.
Hopefully, you will no longer be difficult for MacOS whenever you want to download software from outside to your computer to serve the purpose of work, study or entertainment anymore.
But after all, the fact that Apple equips these security features for macOS is also to protect our users, so you should consider, check carefully before you want to install and run an application. someone on my computer. Good luck !
CTV: Nguyen Thanh Tung – Blogchiasekienthuc.com
Note: Was this article helpful to you? Do not forget to rate the article, like and share it with your friends and relatives!